

You have a Project Zomboid server. This guide takes you from the order to a running, secured server your friends can join: what happens on the first boot, the panel tabs you will actually use, how to set a name and password, how to become admin, and how to add mods. Each step links to a deeper guide if you want the details.
1. Order and first boot
Pick your RAM on the Project Zomboid server hosting page and check out. If you have a discount code from a partner community, enter it in the cart under Apply Discount Code. Not sure how much RAM you need? See How Much RAM Does a Project Zomboid Server Need?.
The server is set up automatically and installs the current stable Build 42. You do not have to choose a version or run any installer. If your group still wants Build 41, see How to Keep Your Project Zomboid Server on Build 41 before you start playing, because worlds do not move between the two.
Open the server from the panel and click Start. The first boot generates the world and takes a few minutes. Follow it on the Console tab and wait for this line before you try to connect:
*** SERVER STARTED ****
That first boot also creates the server's config files. Several panel features (the Config tab, the Mods tab) only work once it has happened.
2. The Overview: your address and logins
The Overview tab is the page you will come back to most. The connection card shows your IP and Port as two separate fields with copy buttons, because that is how Project Zomboid asks for them.
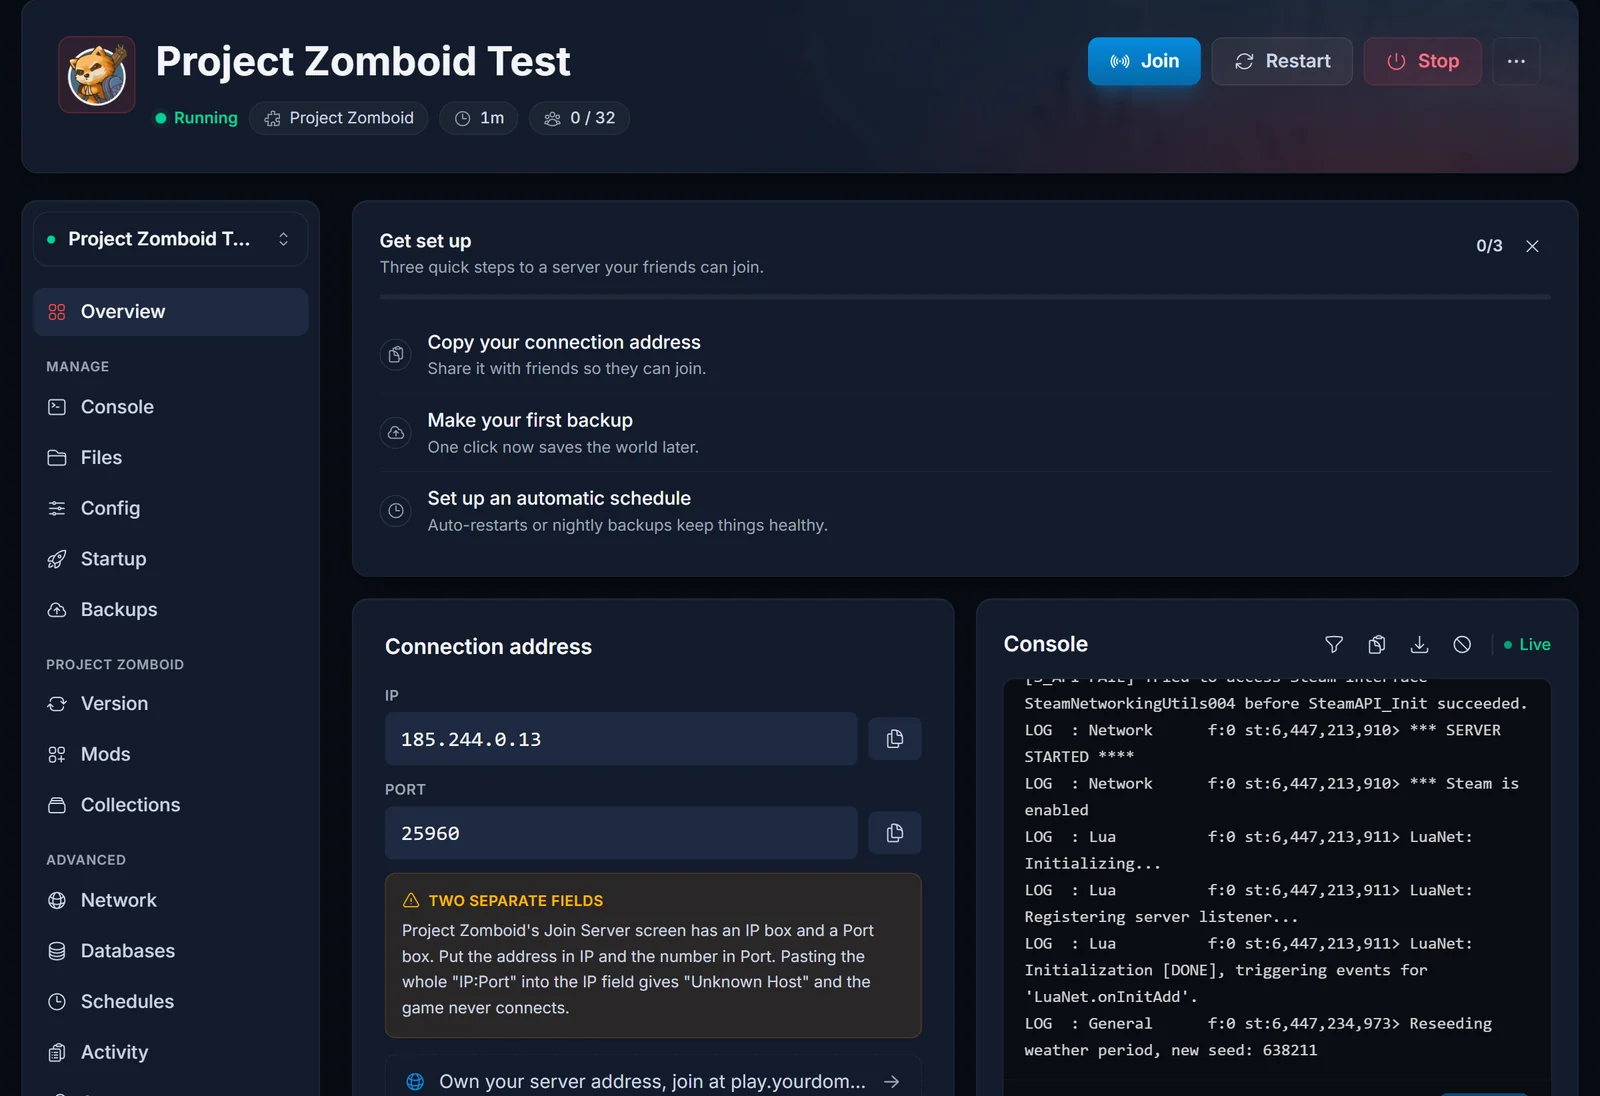
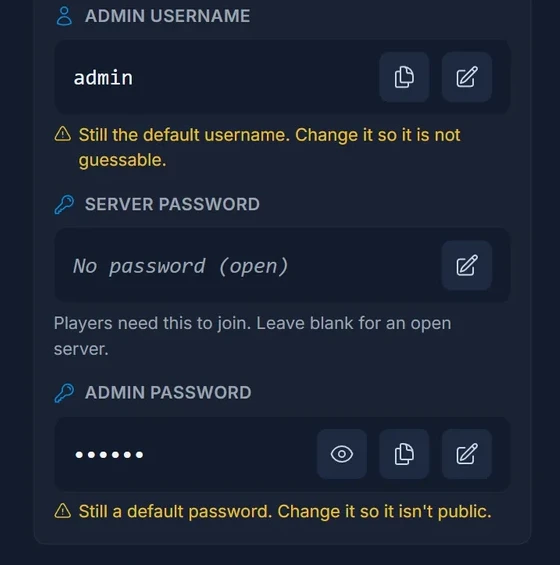
Under it you will find the Admin username, Server password and Admin password.
3. Secure the admin account first
Every new server comes with a built-in admin account that uses a default username and password, and the panel marks both in amber until you change them. Anyone who knows the default pair can log in with full control of your world, so change this before you share the address.
- Click the pencil next to Admin password on the Overview and set your own password.
- Optionally change Admin username too. Project Zomboid accepts either plain
adminor a name that does not start with "admin". - Restart the server.
Always change the admin password in the panel, not with the in-game changepwd command: the server applies the panel's value on every boot, so a console change reverts at the next restart.
4. Name your server and set a password
Open the Config tab. The settings a new owner needs are at the top:
- Server name and Description: what players see in the in-game server browser.
- List on public browser: show the server under the Internet tab in game. Leave it off for a private group.
- Server password: one shared password every player types to get in. Leave it blank to let anyone with the address join.
- Open to new players: turn it off once everyone has made a character, to lock the server to existing accounts.
- Max players, PvP, Pause when empty: the usual group settings.
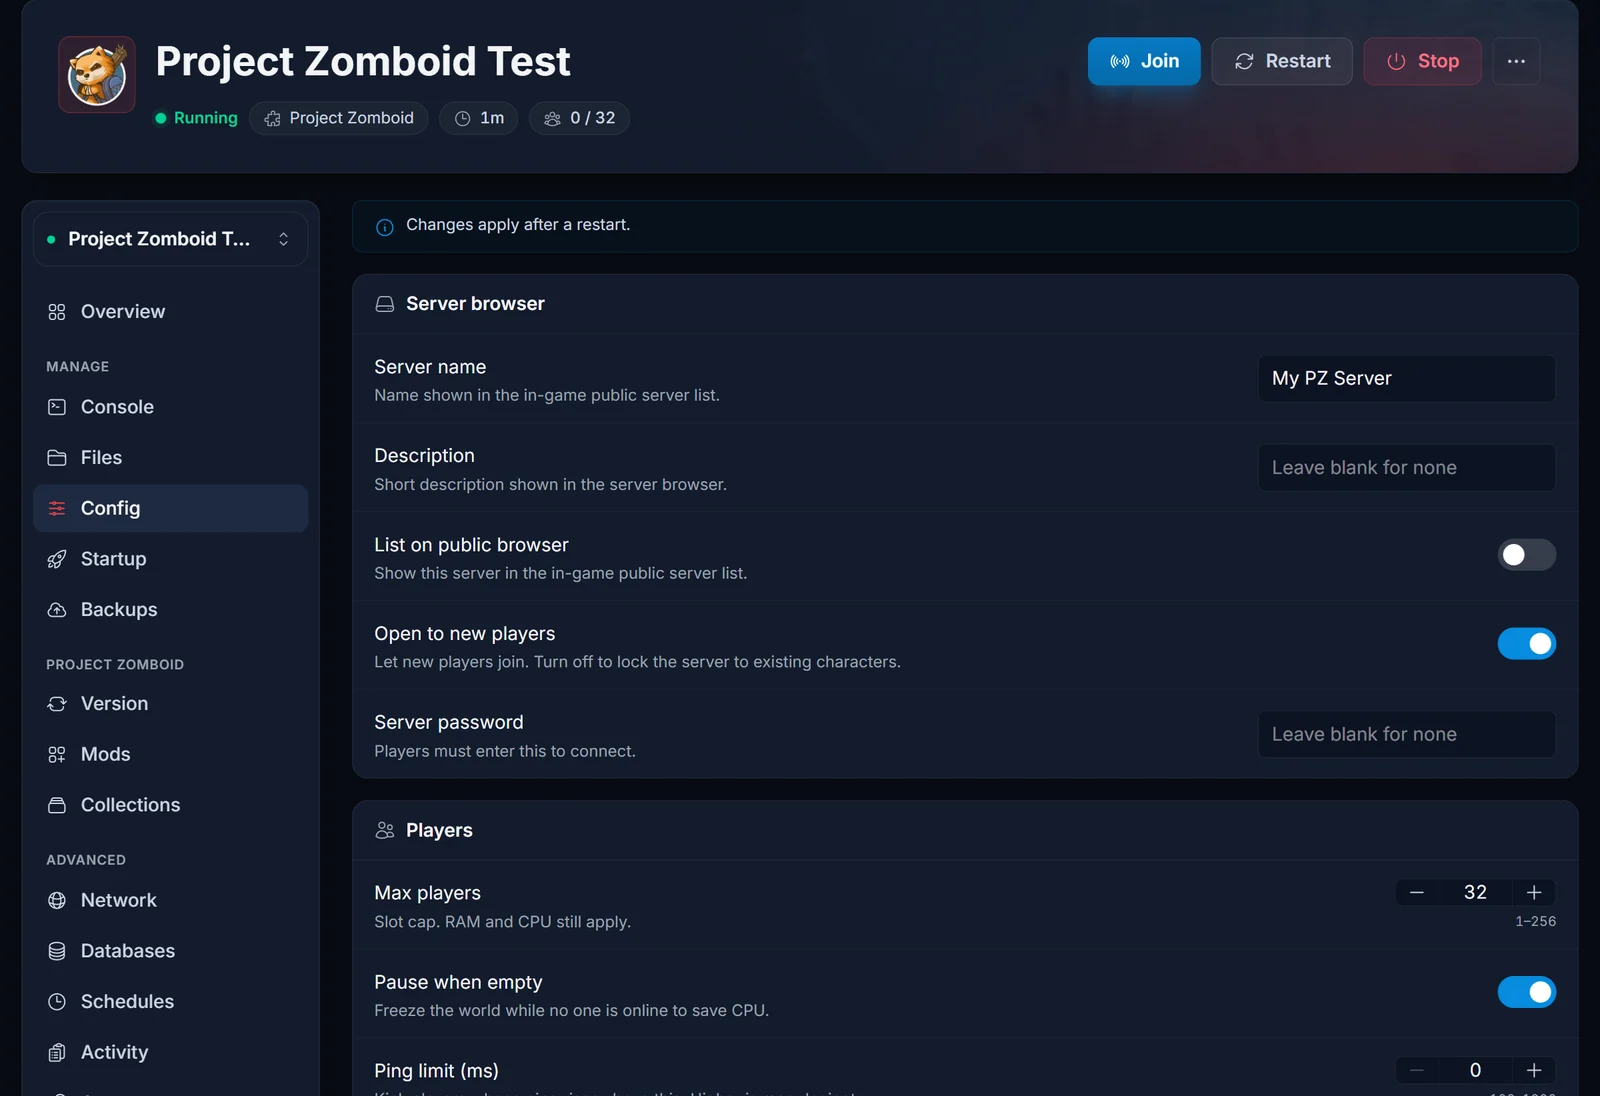
Save, then restart the server: Project Zomboid reads these settings on boot. Everything else (zombie population, loot, day length, XP) is in the world's sandbox settings, explained in Project Zomboid Sandbox Settings Explained. For editing the config files directly, see How to Change Your Project Zomboid Server Settings.
One setting to leave alone: Server Name on the Startup tab. That is the internal name, not the one players see. Project Zomboid uses it to name the save folder, the config file and the player database, so changing it boots a brand new world with default settings. Use Server name in the Config tab for the public name.
5. Join the server
- Start Project Zomboid and click Join.
- Open the Favorites tab.
- Paste the IP into IP and the port into Port. Never paste
IP:Portinto the IP box, that gives "Unknown Host". - Fill in Server Password if you set one.
- Pick an Account Username and Account Password. These become your character login on this server, so write them down.
- Click Add, select the server and click Join Server.
The full walkthrough with screenshots is in How to Join a Project Zomboid Server.
6. Become admin
You have two options:
- Log in as the admin account: use the Admin username and Admin password from the Overview as your account login on the join screen. Good for first setup and for recovery.
- Give your own character admin: once you have joined once, type this in the Console tab (no slash in the console):
grantadmin YourUsername
In game, admin commands then work in chat with a / in front. More in How to Become Admin on a Project Zomboid Server and the full list in the Project Zomboid Server Commands Guide.
7. Install mods
The Mods tab searches the Steam Workshop for you. Search for a mod, click Add, and restart. The panel writes both the Workshop ID and the mod ID into your config, which is the part people usually get wrong when editing the file by hand. Make sure every mod you add says it supports Build 42.
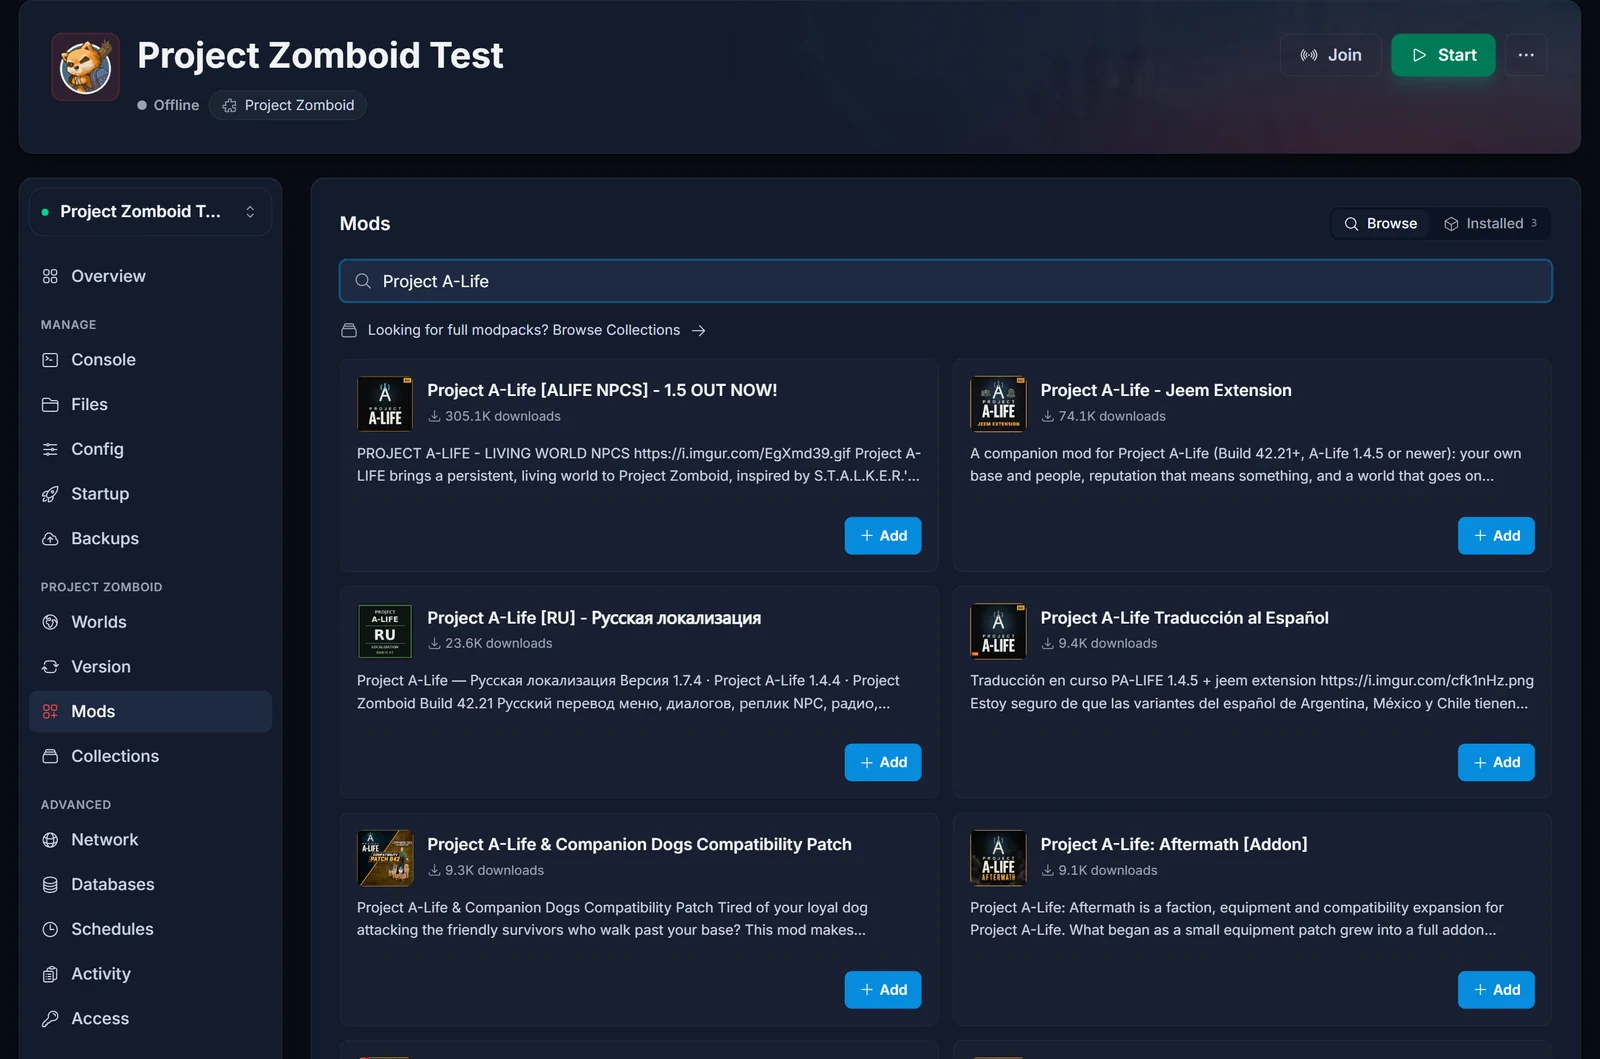
The Collections tab next to it imports a whole Steam Workshop collection in one go. Players who join are subscribed to your mods automatically.
- Manual install, map mods and load order: How to Install Mods on a Project Zomboid Server (Build 42)
- Want NPC survivors and factions? How to Install Project A-Life on Your Project Zomboid Server
8. The other tabs worth knowing
- Console: live server log, and where you type server commands.
- Files: browse and edit server files. Your config is in
/.cache/Server/, named after the Startup tab's Server Name (Pterodactyl.inion a new server). - Backups: take a backup before big changes like adding a heavy mod. See How to Back Up and Restore Your Project Zomboid Server.
- Worlds: upload a world from your own PC or another host, or reset the map. See How to Upload a World to Your Project Zomboid Server and How to Reset or Wipe Your Project Zomboid Server Map.
- Schedules: automatic restarts, for example once a night.
- Startup: the admin login, Steam auto update and other launch settings.
Common issues
Players get "Unknown Host". They pasted the IP and port together into the IP box. Split them.
Connection times out. The server is still loading. Wait for SERVER STARTED in the console.
My Config tab changes did nothing. Restart the server. Settings are read on boot.
The Mods tab says to start the server first. The config file is created on the first boot. Start the server once, then add mods.
A mod is installed but does nothing in game. It is probably a Build 41 mod, or its mod ID is missing from Mods=. Check the console for a loading <ModID> line.
I want a private server. Set a Server password, or turn off Open to new players and add people yourself: How to Set Up a Whitelist on a Project Zomboid Server.
