

Plasmo Voice adds proximity voice chat to Minecraft, and on a DoomHosting server it works without opening any port. By default it sends voice over the same port number as your Minecraft server, and every port on your server already carries both TCP (the game) and UDP (the voice). Install it, start the server, and players with the client mod can talk. The one case that needs an extra step is a server with Bedrock crossplay, covered further down.
What you need
- On the server: Plasmo Voice as a plugin (Paper, Purpur, Spigot) or as a mod (Fabric, Forge, NeoForge).
- On every player's PC: the Plasmo Voice client mod for their loader and Minecraft version. Players without it can still join and play as usual, they just have no voice chat.
You do not need a separate "UDP port". There is no such thing on your server to create: a port is a number, and each one you have works for both protocols.
Step 1: install Plasmo Voice on the server
- Open your server in the DoomHosting panel.
- Go to the Plugins tab (Paper, Purpur, Spigot) or the Mods tab (Fabric, Forge, NeoForge).
- Search for Plasmo Voice and click Install.
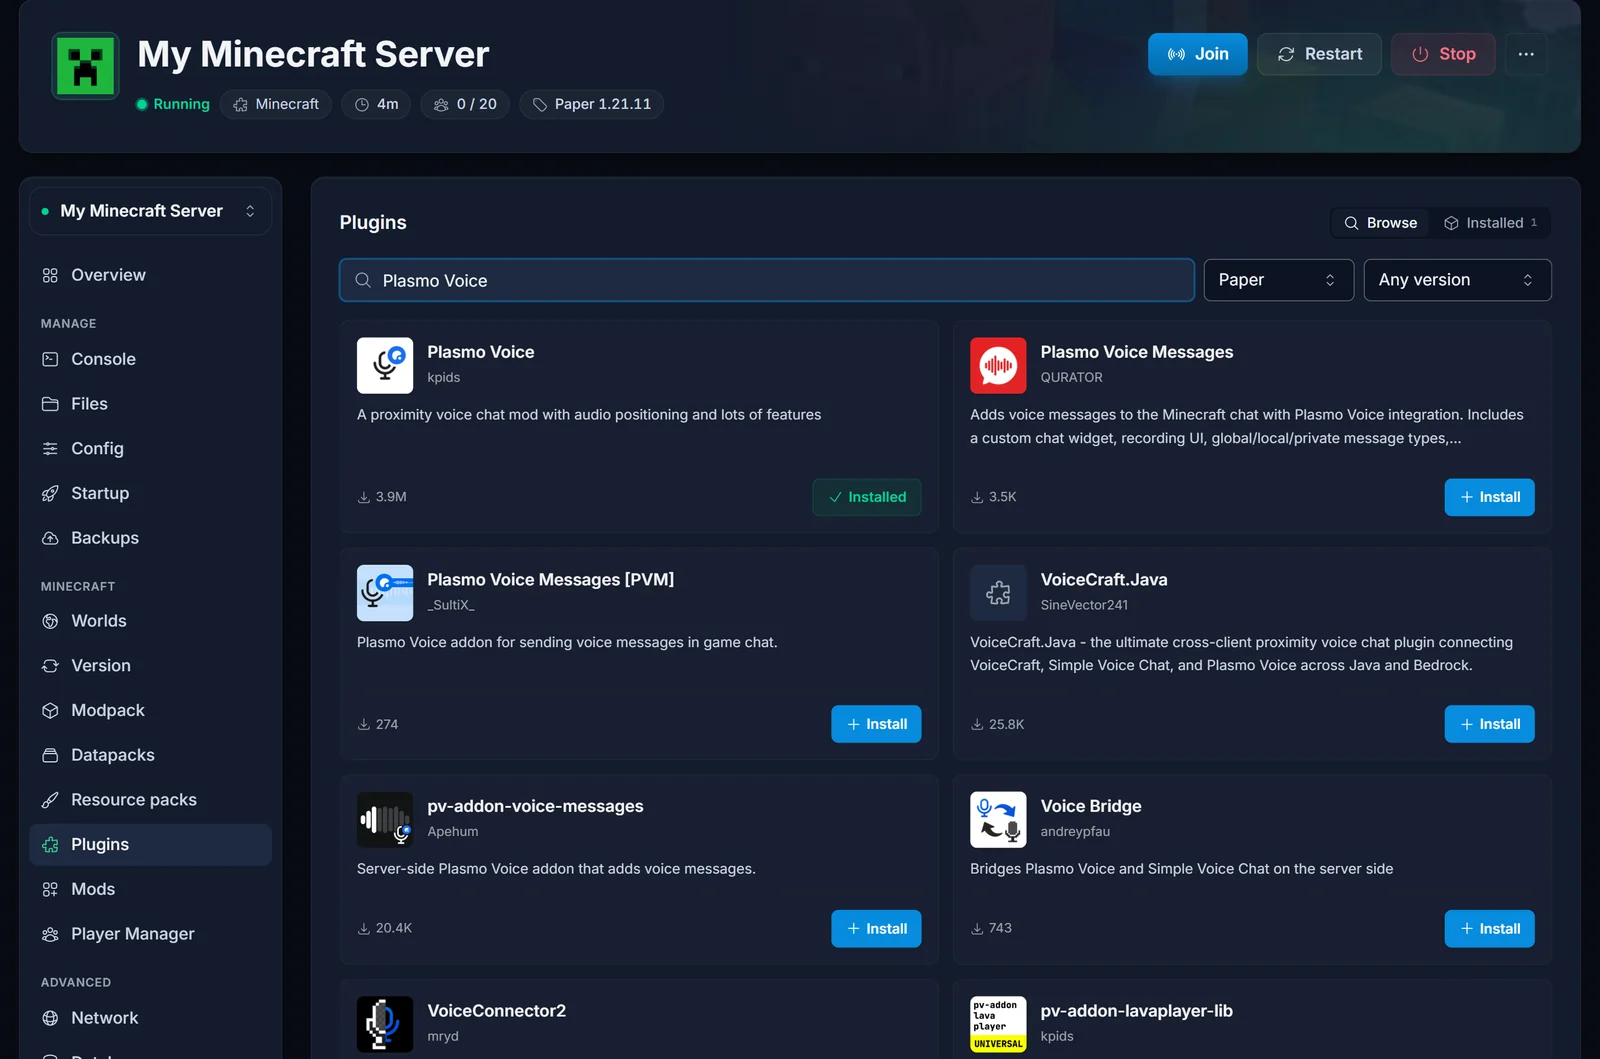
If you would rather upload it yourself, download the server file from Modrinth and put it in /plugins or /mods from the Files tab.
Step 2: start the server and read the console
Start the server and watch the Console tab while it boots. Plasmo Voice prints the port it is listening on:
[PlasmoVoice] EpollDatagramChannel UDP server is started on /[0:0:0:0:0:0:0:0]:25565
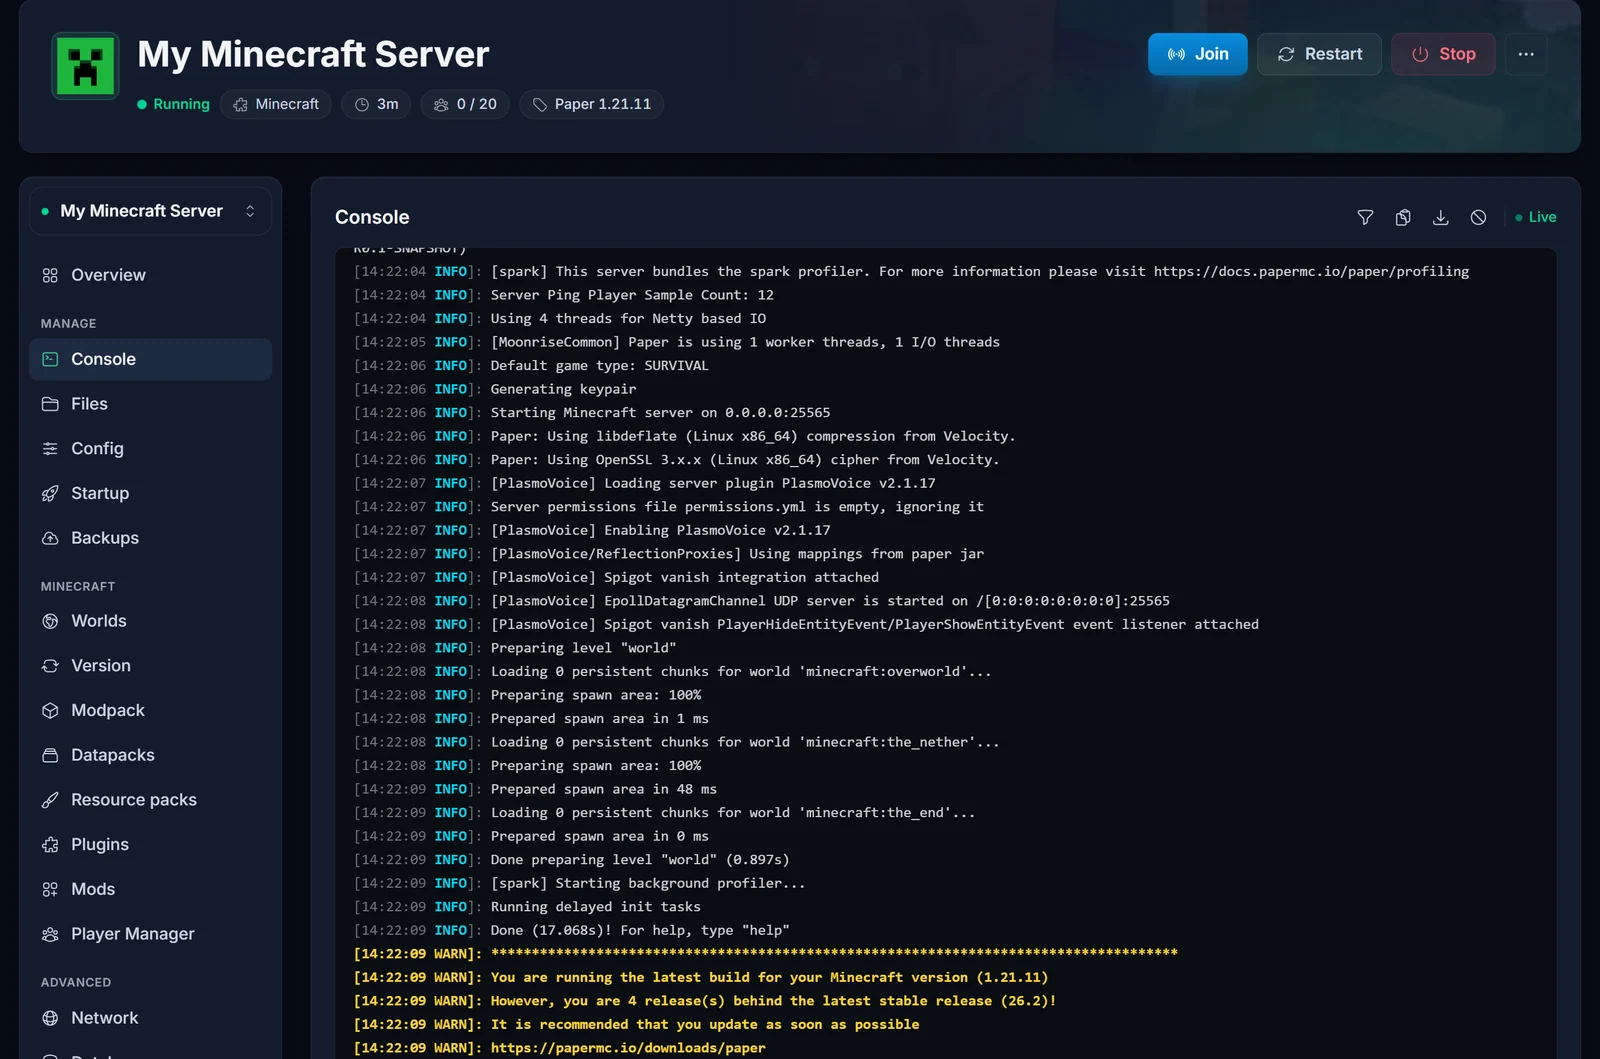
The number at the end should be the same as the port in your server address (yours will differ from the example). If it is, you are done on the server side. Voice chat uses your normal server address and there is nothing else to configure.
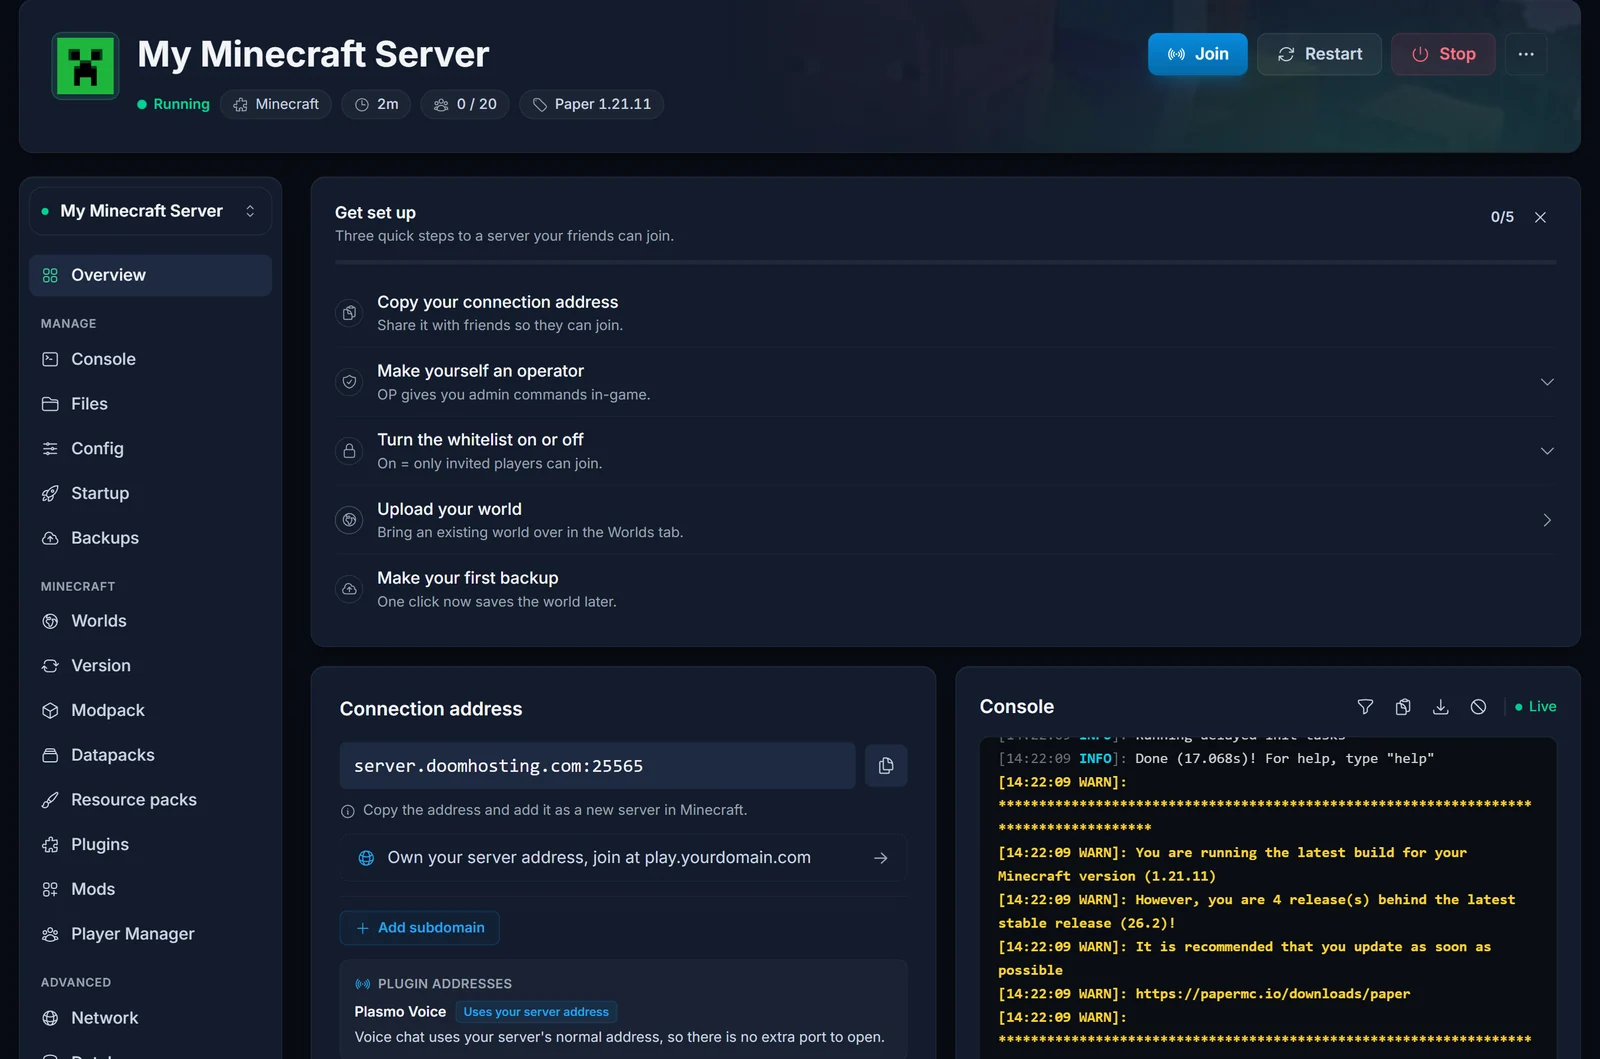
The Overview page confirms it as well: under Plugin addresses, Plasmo Voice carries the Uses your server address badge.
Step 3: install the client mod and join
Each player installs the Plasmo Voice mod on their own game, then joins with the usual server address. In game, press V to open the Plasmo Voice menu, pick a microphone, and choose between push to talk and voice activation.
When Plasmo Voice needs its own port
Sharing the main port only works while nothing else is using the UDP side of it. Two things can:
- Bedrock crossplay (GeyserMC) running on your main port. See how to enable Minecraft crossplay with GeyserMC.
- The Minecraft query listener, which is
enable-query=trueinserver.properties.
Plasmo Voice starts early and takes the port first, so voice chat keeps working and the other feature breaks. With crossplay that means Bedrock players suddenly cannot join, and the console shows GeyserMC failing with Address already in use. The fix is to move Plasmo Voice to a port of its own:
- Stop the server.
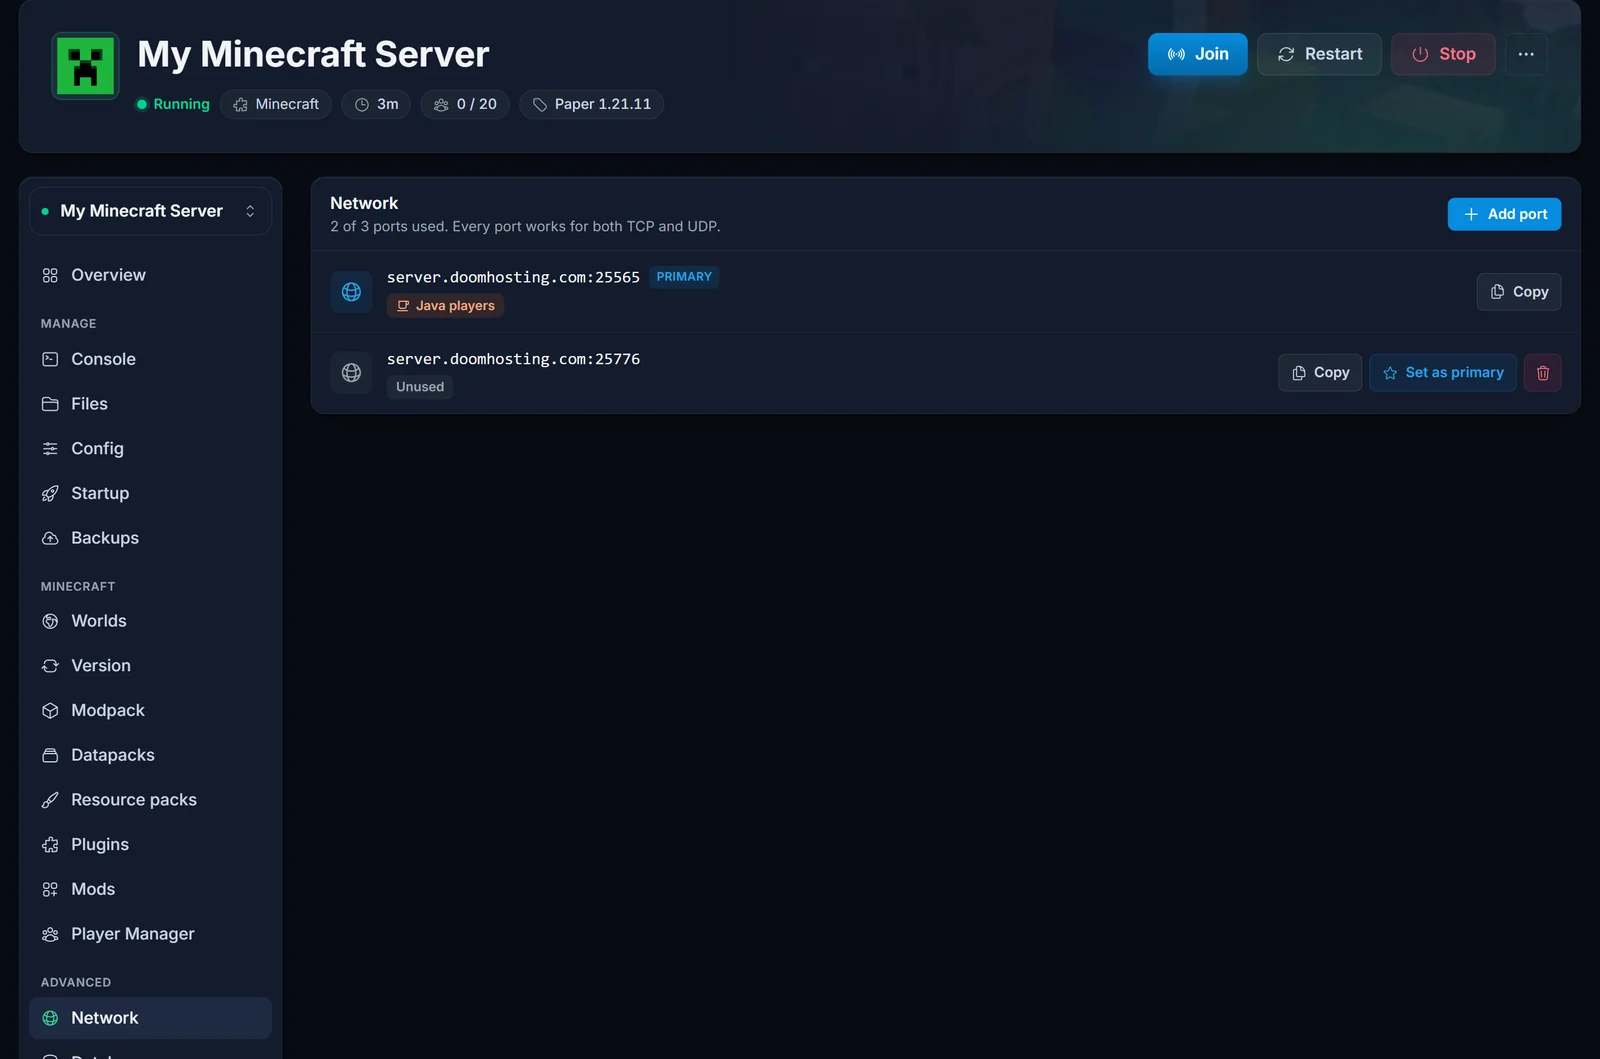
- Open the Network tab and click Add port. Note the new port number. It works for UDP straight away.
- Open the Files tab and edit
/plugins/PlasmoVoice/config.toml. On a Fabric or Forge server the file is/config/plasmovoice/config.toml.
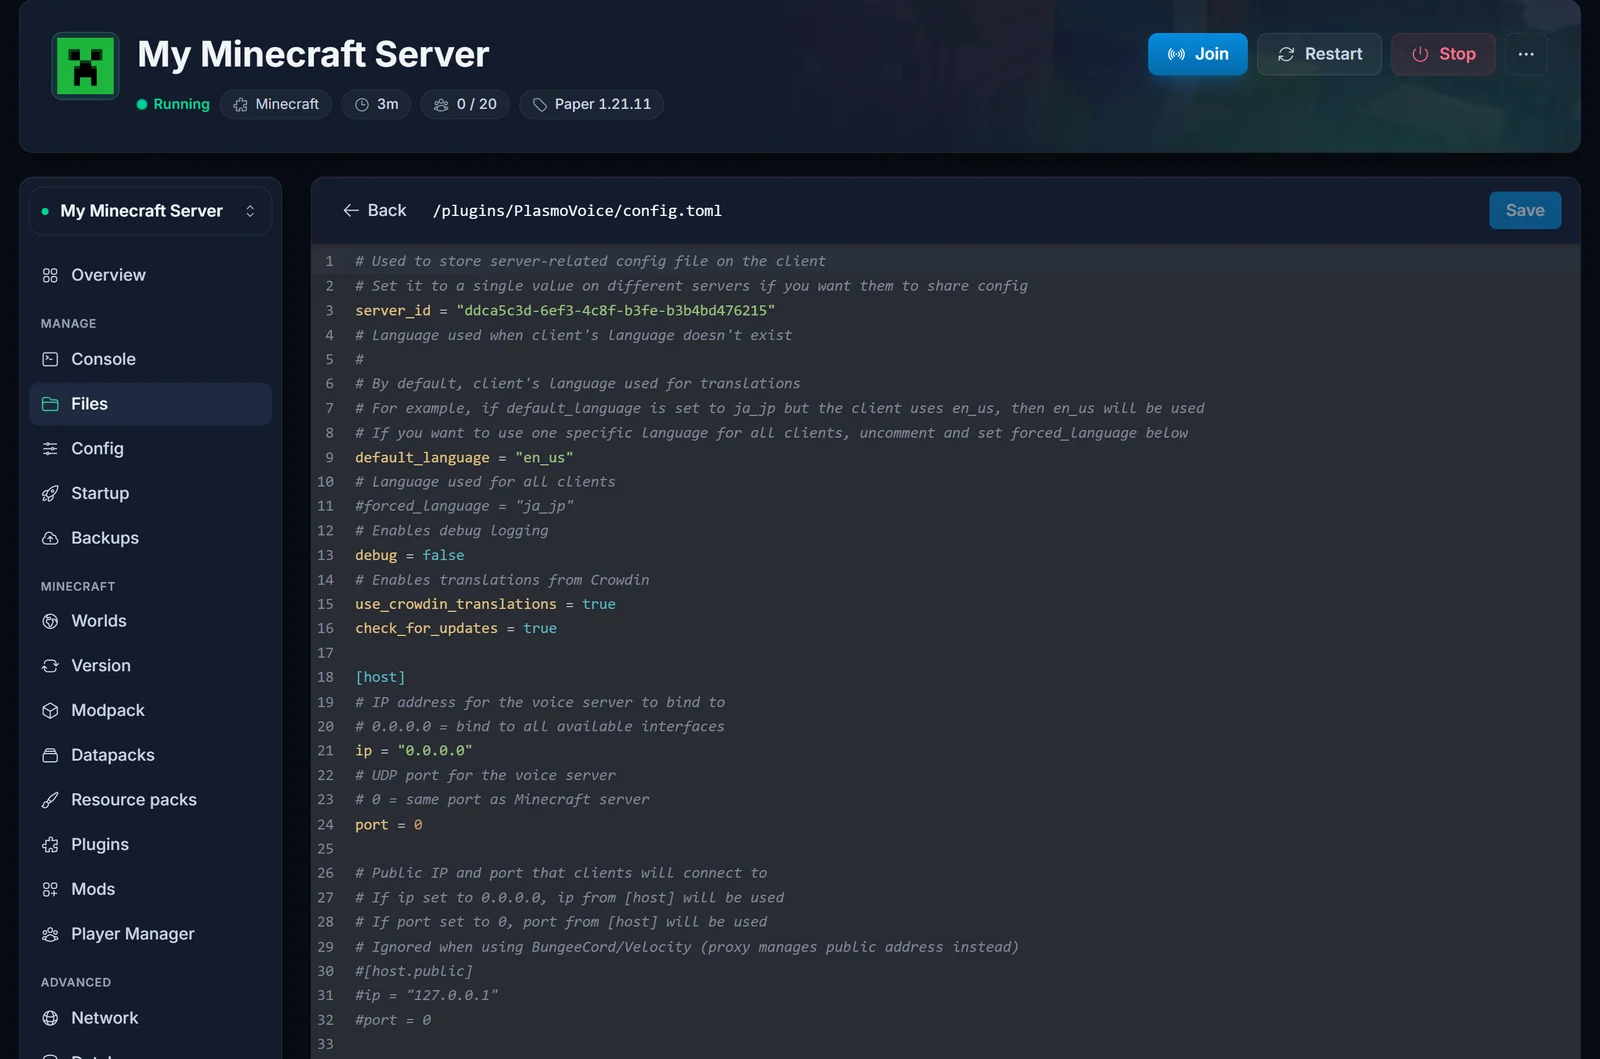
- Under
[host], replace the0with your new port:
[host]
ip = "0.0.0.0"
port = 25776
- Save and start the server. The console line from Step 2 now ends in the new port, and GeyserMC starts normally on the main one.
Players change nothing. They still join with the normal address, and the server tells their client which port to use for voice. Leave the [host.public] block commented out unless you run a proxy.
If you install Plasmo Voice from the Plugins tab on a server where Bedrock crossplay uses the main port, the panel picks a free port and writes it into the config for you.
Common issues
The voice icon shows no connection
Compare the port in the console line with the ports listed on the Network tab. If port in config.toml is set to a number that is not on that list (often copied from a tutorial written for a home server), nothing outside can reach it. Set it back to 0, or to a port you added.
Bedrock players cannot join since I installed Plasmo Voice Plasmo Voice took the UDP side of your main port before GeyserMC could. Give it its own port as described above.
One player cannot hear or be heard They are missing the client mod, their mod does not match the server's Minecraft version, or a firewall or VPN on their side is blocking UDP. Everyone else working means the server is fine.
I edited config.toml and nothing changed Plasmo Voice reads the file when it starts. Edit it while the server is stopped, then start it again.
I run Velocity or BungeeCord Plasmo Voice has to be installed on the proxy as well as on the servers behind it. Follow the proxy section of the Plasmo Voice documentation.
Prefer a different mod? See how to set up Simple Voice Chat on your Minecraft server. Need a server first? Have a look at Minecraft server hosting.
