

Dynmap gives your Minecraft server a live, browser-based map of your world that updates as players build and explore. Installing it on a DoomHosting server is three jobs: getting your server onto a Minecraft version Dynmap actually supports, a one-click plugin install, and the step most guides leave out, opening a port so the map is reachable from the internet.
First, check which Minecraft versions Dynmap supports
Do not skip this. It is a hard prerequisite, not a nice-to-have.
Dynmap's Paper and Spigot builds run behind Minecraft itself. When a new Minecraft version ships there is usually a gap of weeks or months before a matching Dynmap build appears, so the newest Minecraft is often the one version you cannot use. Check what the plugin actually supports before you install: the version list in the panel's install dialog shows the supported game versions, and so does Dynmap's page on Modrinth.
If your server runs a newer Minecraft than Dynmap's newest Paper build supports, the plugin installs, it loads, and then it switches itself off. The console tells you exactly that:
[Dynmap] bukkit version incompatible!
[Dynmap] Dynmap is disabled (unsupported platform)
No error dialog, no crash, just a plugin that quietly does nothing. Those two lines are the symptom to recognize.
At the time of writing (August 2026), the newest Paper build of Dynmap is 3.7-beta-8 and it supports up to Minecraft 1.21.4. Check the current figure yourself rather than trusting that one, because it moves. There is also a Dynmap 3.8, but it is a Forge and Fabric release, so it does not help a Paper or Spigot server.
So before you install anything, open the Versions tab in the panel and put the server on Paper at the newest Minecraft version Dynmap supports. Your world folder is kept. If you are currently on a plain Vanilla jar, this switch is doubly necessary: Vanilla cannot load plugins at all.
The other thing to know up front is how Dynmap serves the map. It does not use your Minecraft port. It runs its own built-in web server, on port 8123 by default. On a home PC that port is simply free. On a hosted server it is not: your server only owns the ports that have been allocated to it, so 8123 does not exist for you and the map will never load until you allocate a port and point Dynmap at it. That is covered below.
Install Dynmap from the Plugins tab
- Open your server in the panel and go to the Plugins tab.
- Leave the Minecraft version filter on Any version (the default), or set it to a version Dynmap supports. This matters: filter by a version Dynmap has no build for and it disappears from the results entirely.
- Search for
dynmap. Dynmap by mikeprimm is the first result. - Press Install. The install dialog is already filtered to your loader and preselects the correct Spigot jar, so you can accept what it offers.
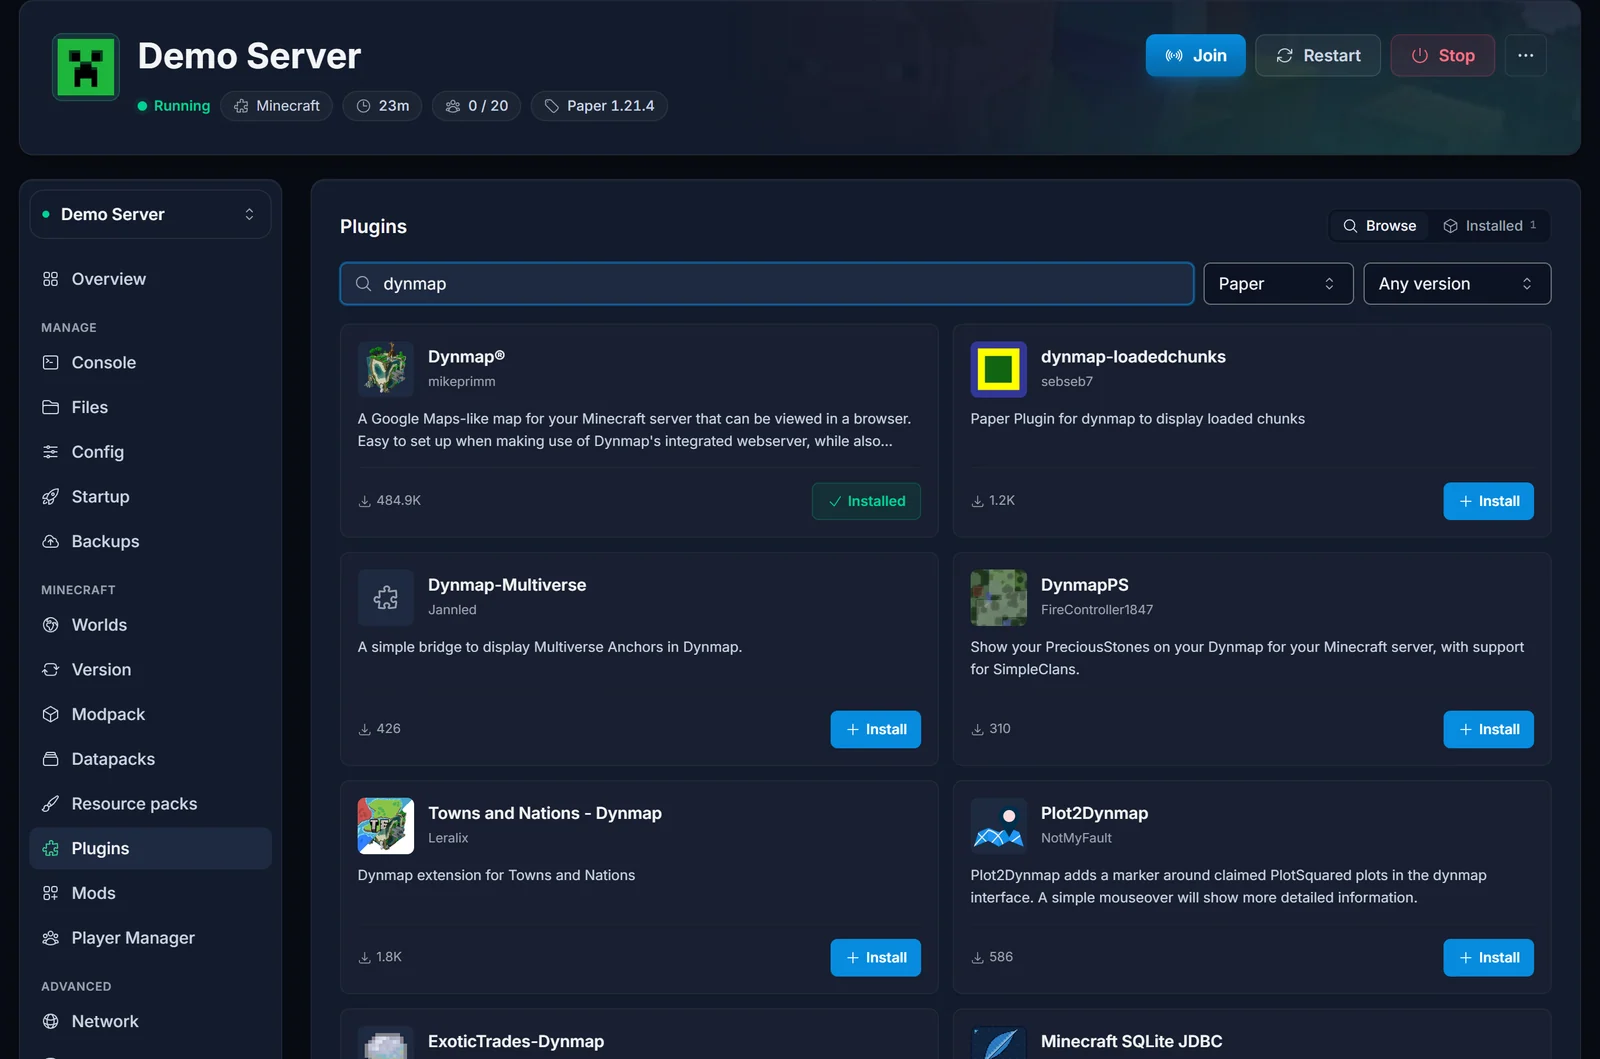
The panel downloads the jar straight into your server's plugins folder, so there is no FTP step and nothing to upload by hand.
Start the server once to generate the config
Dynmap does not write its configuration at install time. It writes it the first time the server starts with the plugin present. So start the server now and let it come up fully.
After that first start, the folder plugins/dynmap/ exists and contains configuration.txt, the file you are about to edit. If the folder is missing, the plugin did not load: check your Minecraft version against the prerequisite above, and see Common issues at the end.
Add a port for the Dynmap web map
Now give the map a port of its own.
- Go to the Network tab.
- Press Add port. Wings picks a free port on the node automatically, so there is nothing to choose or type.
- Write down the port number it hands you.
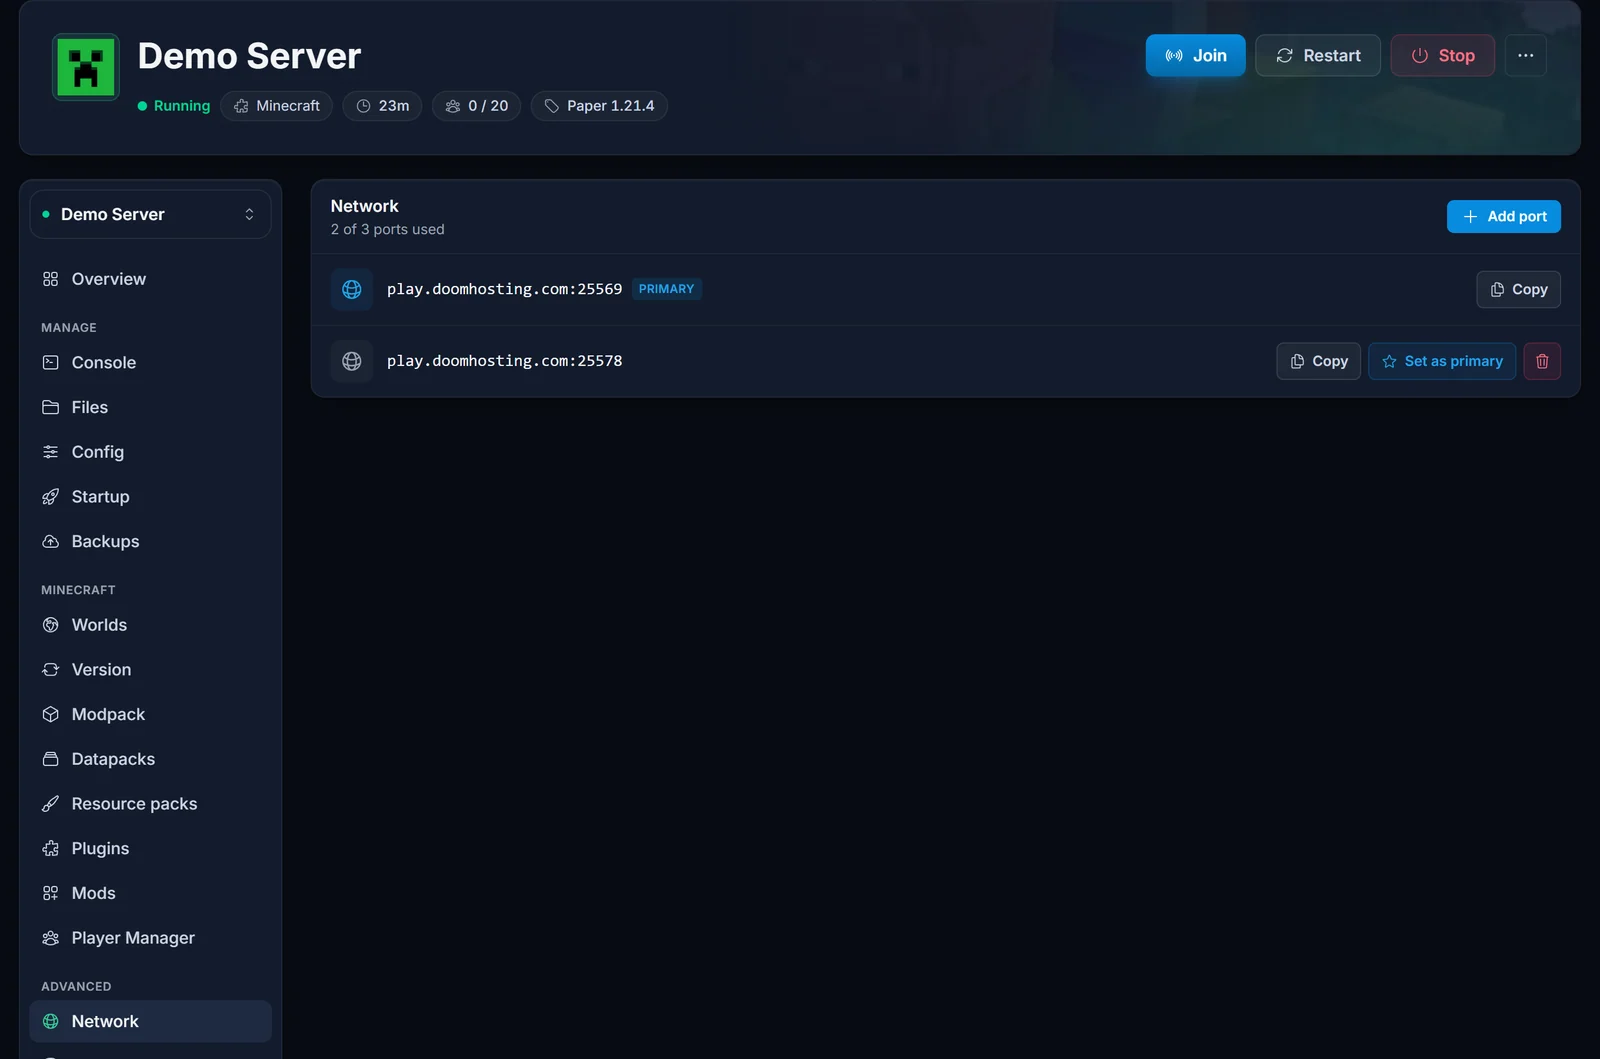
Every DoomHosting Minecraft server can add at least one extra port, so this works on any plan. Do not try to reuse your Minecraft game port (25565 by default): that one is busy serving the game, and Dynmap needs a port of its own.
The screenshots in this guide use a demo server and port 25578. The port you are assigned will be a different number, so use the one your own Network tab shows.
Set webserver-port in configuration.txt
Dynmap still thinks it should use 8123, so change it.
- Open the Files tab.
- Go into
plugins/dynmap/and openconfiguration.txtin the editor. - Find the
webserver-portsetting. It sits in the web server section, around line 357:
webserver-port: 8123
- Replace the value with the port the Network tab gave you:
webserver-port: 25578
Change nothing else in that section. In particular, leave webserver-bindaddress exactly as you found it: it is commented out by default, and the default behaviour is already what you want. Uncommenting it or setting it by hand is a good way to break a working setup.
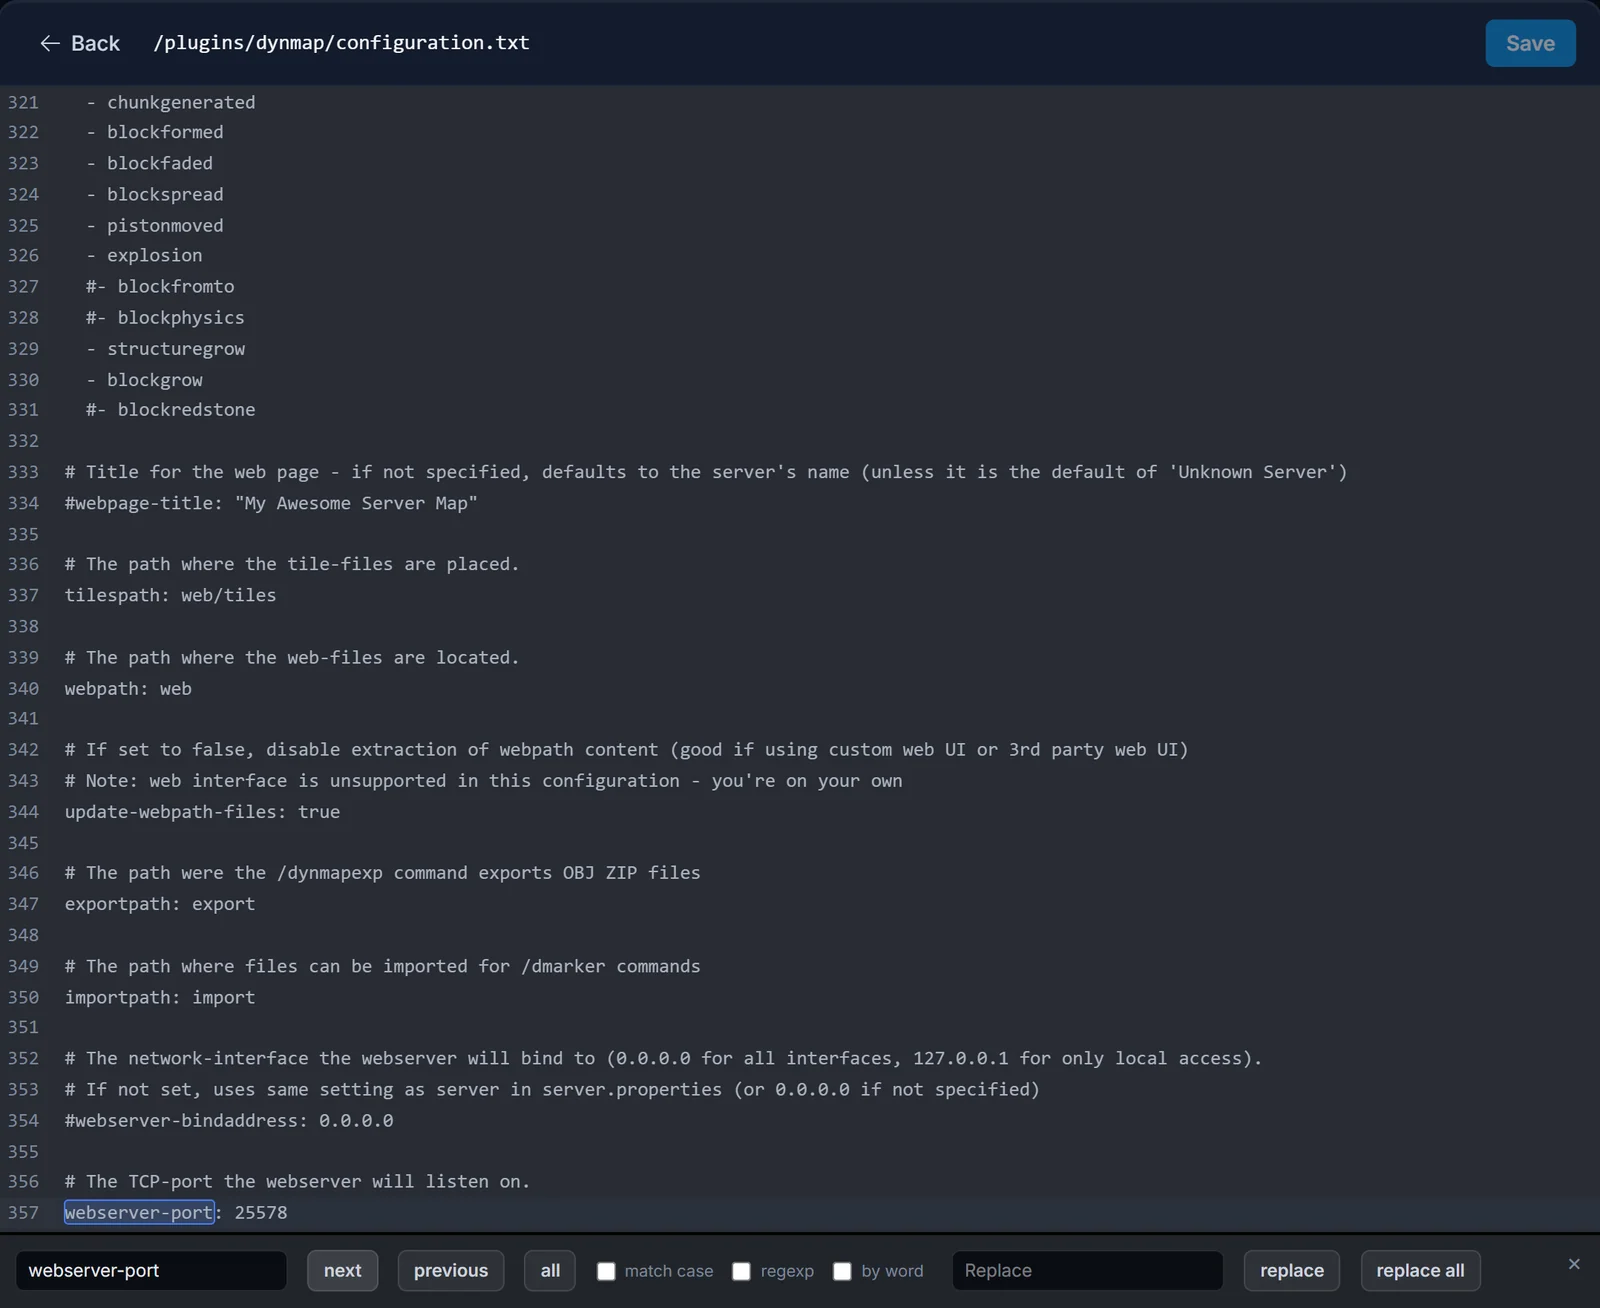
- Save the file, then fully restart the server. Dynmap has no
reloadsubcommand, so a restart is the only way this change takes effect.
Open your map
Once the server is back up, open the map in a browser:
http://SERVER_IP:PORT
Use your server's IP from the panel's connection card and the port you allocated. Note that it is http://, not https://. Dynmap serves plain HTTP, and typing https is a common reason the page looks dead. A working map loads with the page title "Minecraft Dynamic Map".
If the map looks black at first, zoom in. Only the area that has been rendered has tiles, and at the widest zoom level a nearly empty map has nothing to draw yet. That is expected on a fresh install and it is fixed by the next step.
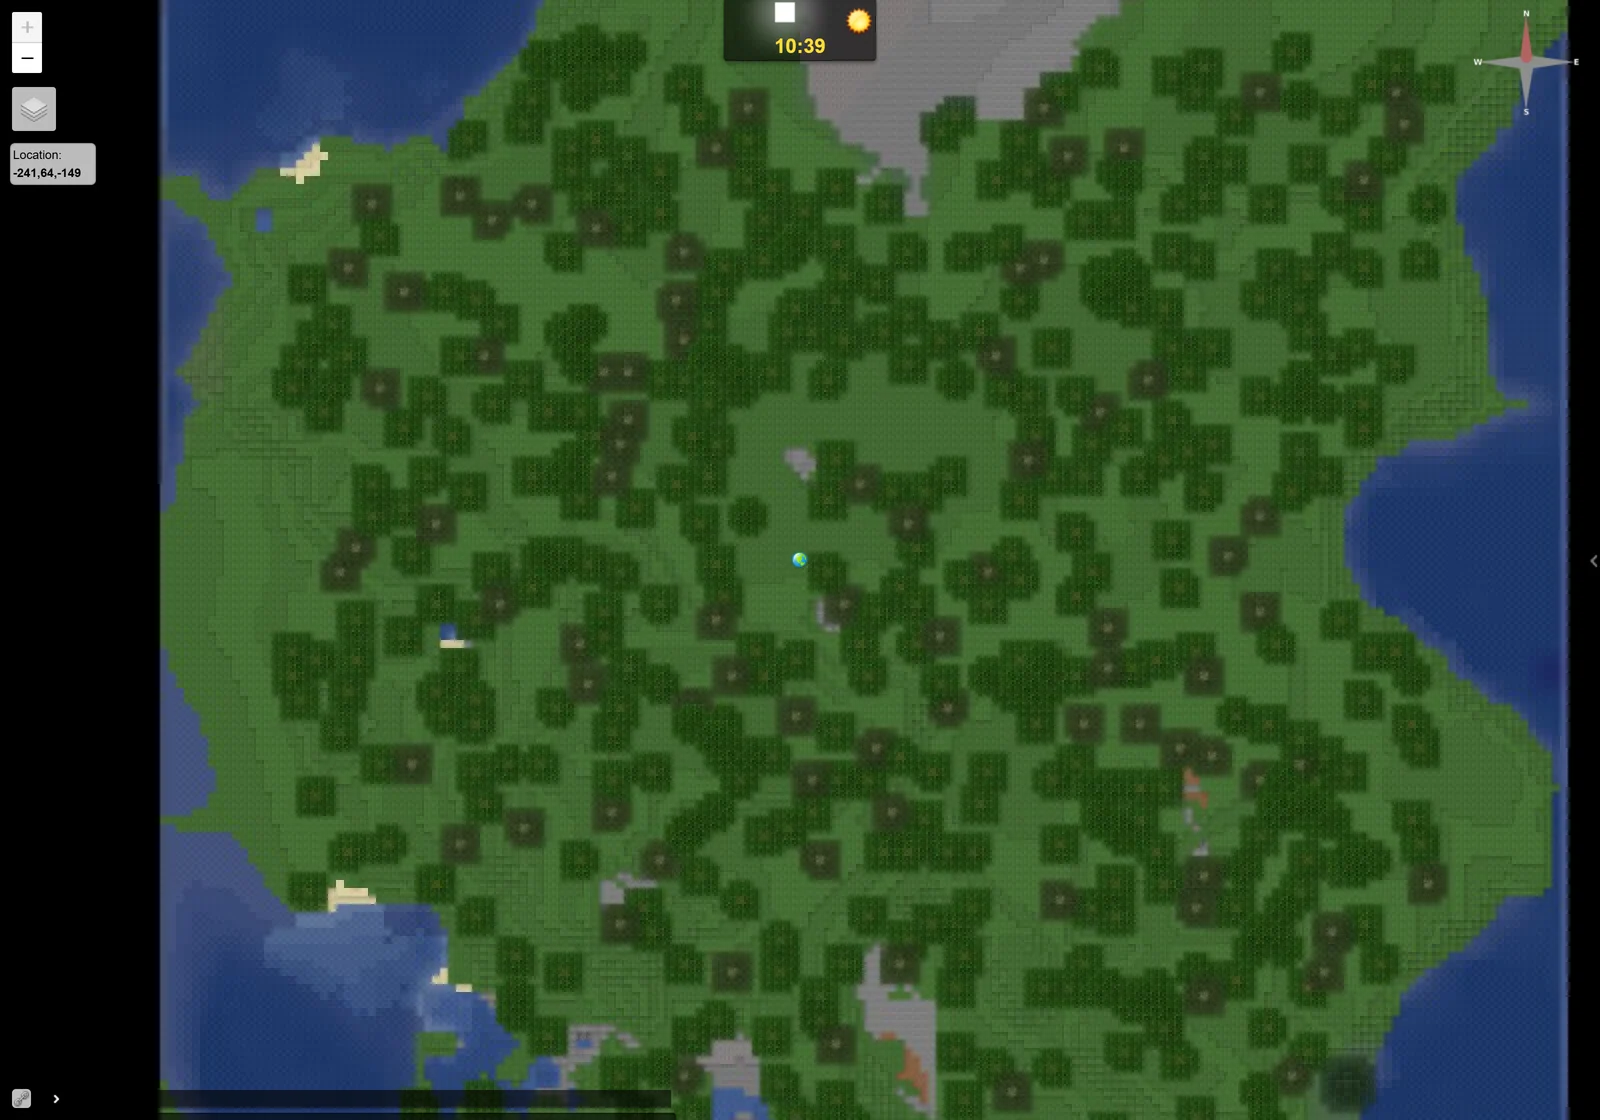
Render your world for the first time
Dynmap renders chunks as players load them, so the map fills in gradually as people explore. To get a complete map immediately, run a full render from the Console tab:
dynmap fullrender world
Note there is no leading slash in the panel console. The slash is only for typing commands in game chat. Run it once per world you want on the map, using the folder names: world, world_nether, world_the_end.
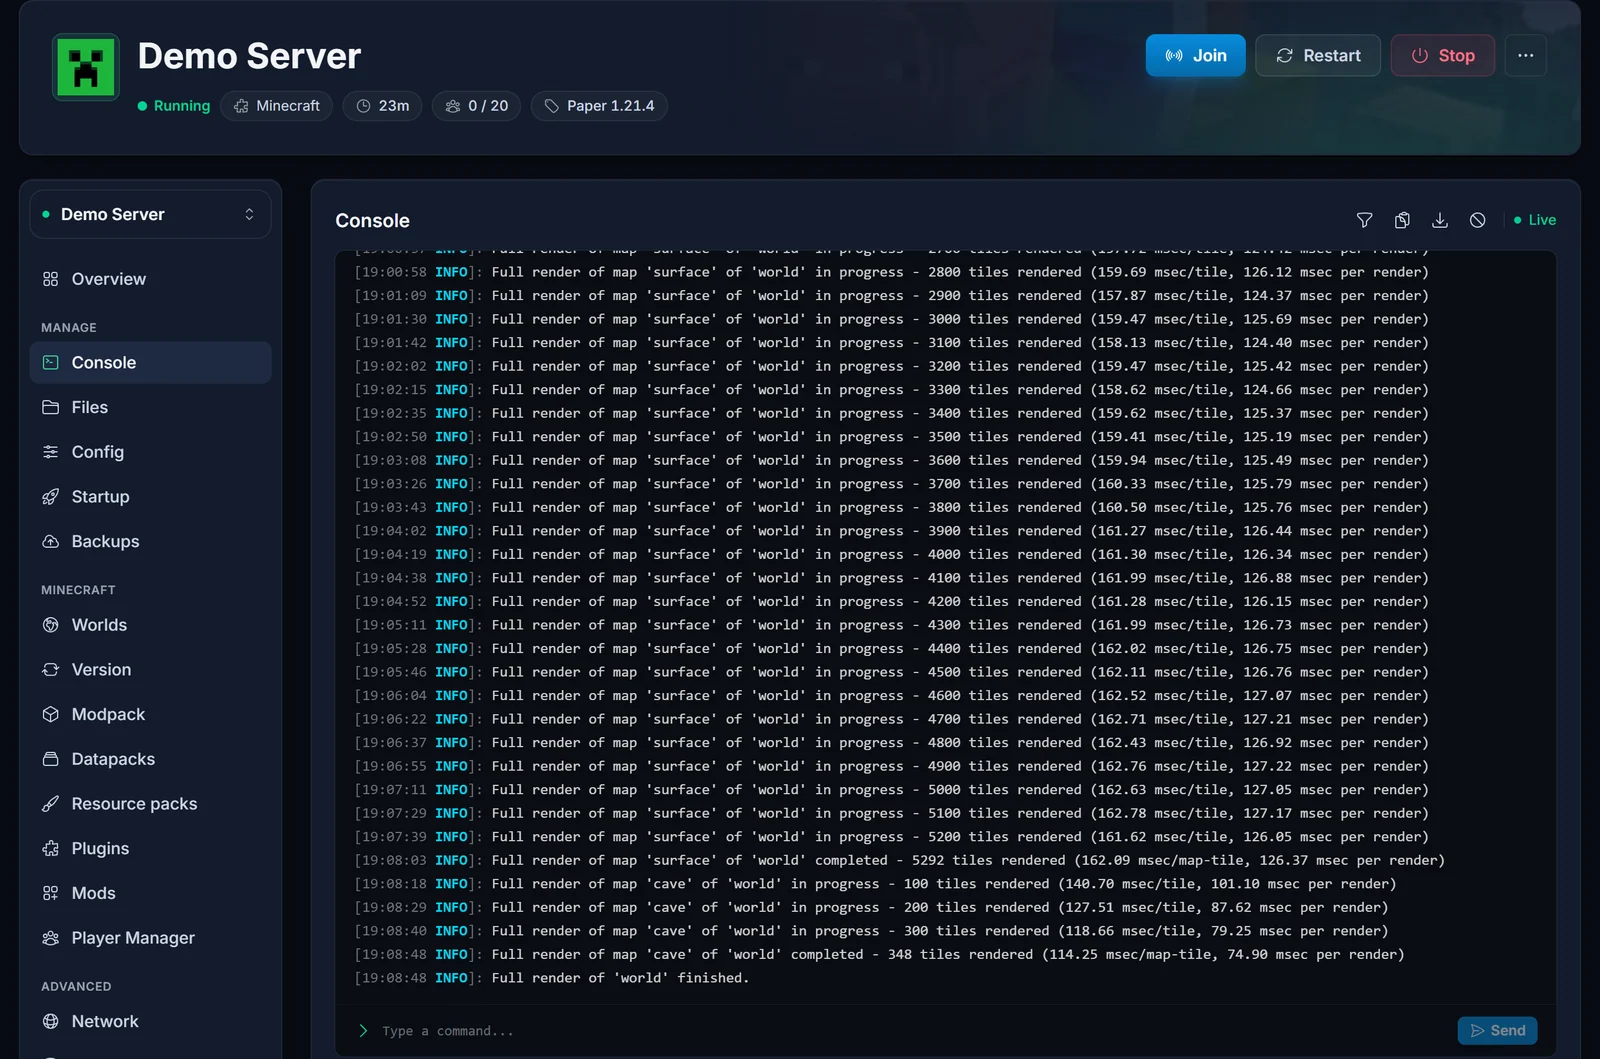
Be honest with yourself about the cost. A full render reads and draws every chunk that exists. It is heavy on CPU and it writes a large number of image tiles to disk. On a small, fresh world it is a few minutes. On a long-running world with a big explored area it can run for hours, and your players will feel it while it works. Start it when the server is quiet.
Two commands worth knowing:
dynmap radiusrender world
dynmap cancelrender world
radiusrender draws a circle around a point instead of the entire world, which is the sensible choice when your players only occupy a few areas of a huge map. cancelrender stops a render that is taking longer than you expected, and you can start it again later.
Common issues
Dynmap installed but nothing happens, and plugins/dynmap/ was never created. Check your Minecraft version first. On a version newer than Dynmap's newest Paper build supports, the plugin loads and immediately disables itself with bukkit version incompatible! in the console. Switch the server to a Minecraft version Dynmap supports on the Versions tab and restart. The other cause is a Vanilla or Forge/Fabric jar, which ignores the plugins folder entirely. The general rules are in Installing Plugins on Your Minecraft Server.
Dynmap stopped working after a Minecraft update. Same problem from the other direction. Updating your server to a Minecraft version that Dynmap does not support yet leaves you with a disabled plugin and a dead map. There is usually a gap of weeks or months between a Minecraft release and a matching Dynmap build. Either hold the server on the last supported version until a compatible build ships, or accept that the map is offline in the meantime.
Dynmap does not appear in the Plugins tab search. The Minecraft version filter is set to a version Dynmap has no build for. Set it back to Any version, or to a version Dynmap does support, and search again.
The map URL does not load. Nearly always one of three things. You skipped the Network tab, so there is no allocated port at all. Or you allocated a port but webserver-port in configuration.txt still says 8123. Or you saved the file and never restarted. Check all three, restart fully, and confirm you are using http:// and the correct IP.
The map loads but is black. Zoom in. Unrendered area has no tiles, so a mostly-unexplored world shows nothing at the widest zoom. Run dynmap fullrender world to fill it in.
The render is slow, or the server lags while it runs. That is a full render doing its job. Cancel it with dynmap cancelrender world, wait for a quiet period, and consider radiusrender instead. If the server is still sluggish once rendering has finished, the cause is elsewhere: see How to Fix Minecraft Server Lag.
Disk usage is climbing fast. Dynmap tiles live in plugins/dynmap/web/tiles, and a big world produces a lot of them. In configuration.txt you can reduce the number of maps that get rendered (the flat, surface, and cave views are separate maps, and you rarely need all of them) or lower the render resolution. Removing maps you do not use is the single biggest saving. You can also delete the tiles folder and re-render later if you need the space back.
"Port already in use", or the web server refuses to start. Something else already holds that port. Confirm you used the port the Network tab allocated and not a number you invented, and that you did not reuse the Minecraft game port. If you have several ports, pick one that no other service is bound to and restart.
Nothing obvious is wrong. The startup log names the real problem. See Find and Share Your Minecraft Server Logs to pull the log and read the Dynmap lines.
Wrapping up
Put the server on a Paper version Dynmap supports first, install Dynmap from the Plugins tab, start once so the config is written, allocate a port on the Network tab, set webserver-port to that number in plugins/dynmap/configuration.txt, restart fully, and open http://SERVER_IP:PORT. Run a full render once when the server is quiet and the map keeps itself up to date after that. Need a hand? Our team is on live chat 24/7. Learn more about Minecraft server hosting at DoomHosting.
