

Your Team Fortress 2 server is installed and running the moment the order completes, so the setup work is naming it, getting it into the server browser and deciding what it plays. This guide walks through all of it in the order that saves you the most backtracking.
Everything below happens in the panel at /panel. If you only want to get your friends in right now, skip to How to Join a Team Fortress 2 Server and come back afterwards.
Find your connect address
Open your server in the panel. The Overview tab shows the address as IP:PORT, with a copy button next to it. That is the whole address a player needs, and it works before you have changed a single setting.
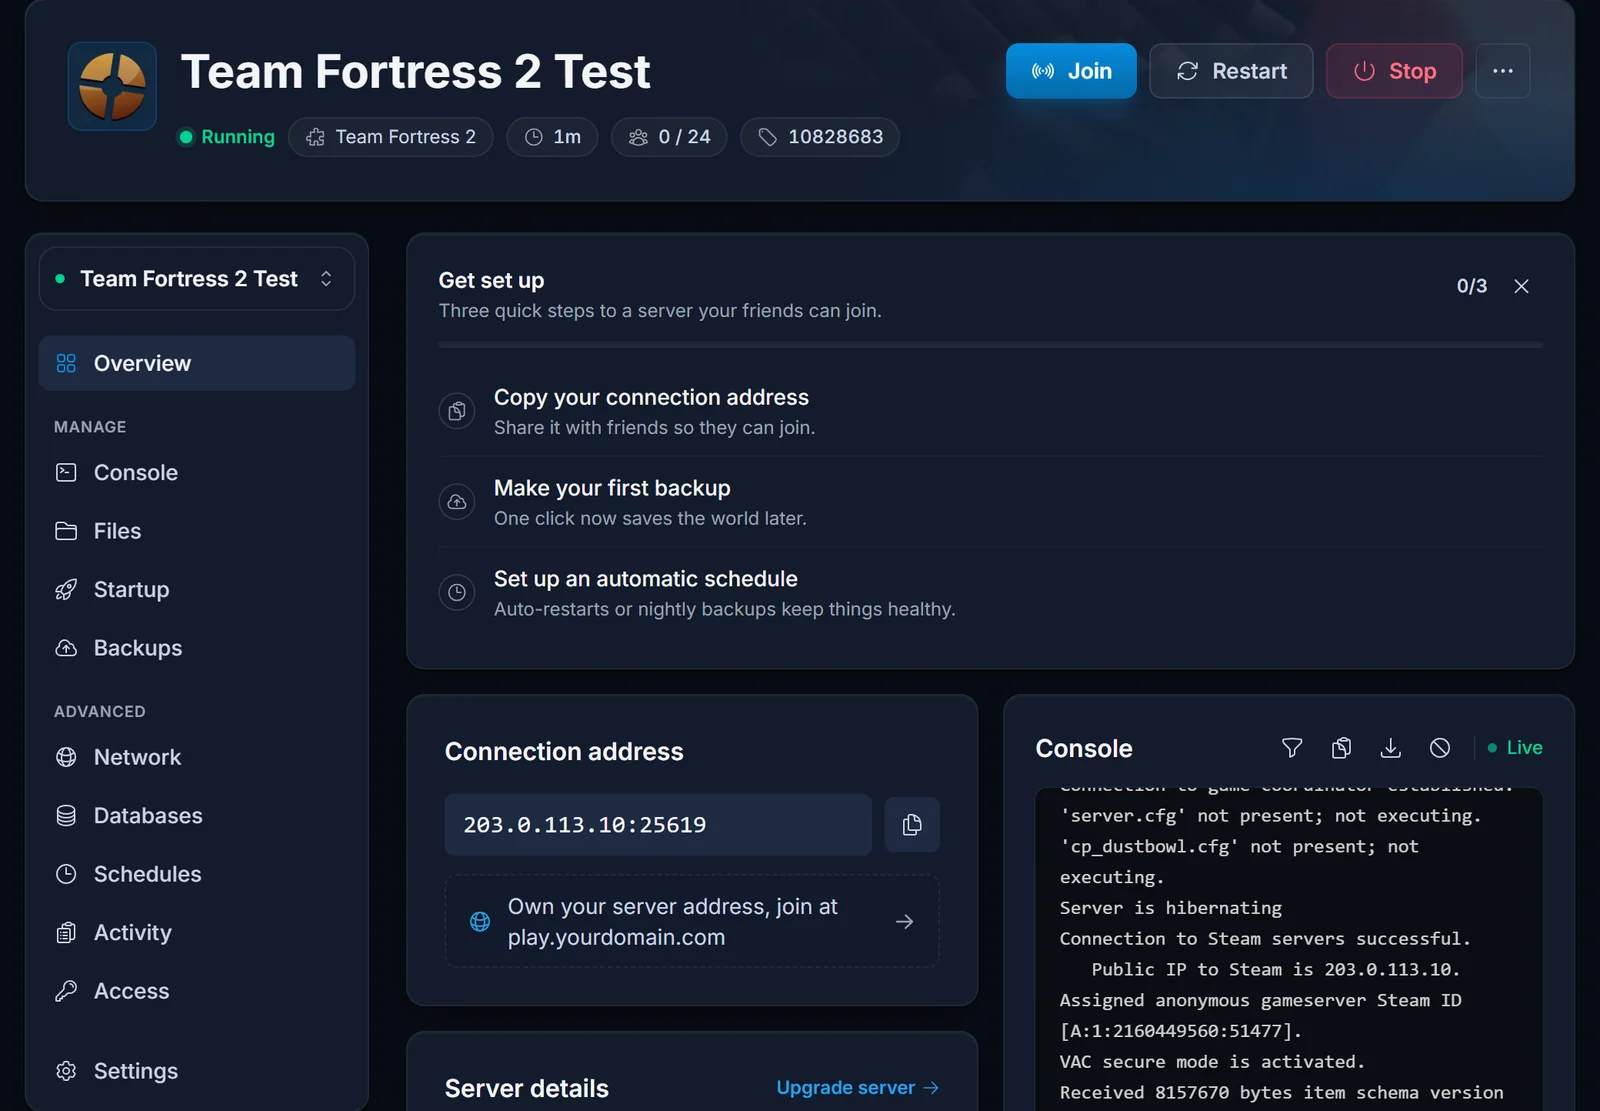
Team Fortress 2 uses one port for everything: game traffic, the Steam query that fills in your server's name and player count, and RCON. There is no separate query port to forward or configure. Because the query answers on that same port, the panel reads the live player count straight off your server and shows it on the Overview tab.
Add your Steam Game Server Login Token, if you want to be listed
Your server starts and accepts players without a token. We tested exactly that: a fresh server with the token field left empty boots normally and anyone who has your IP:PORT can connect. The token is optional, and it buys you one specific thing: a place in the public in-game server browser.
That token is a Steam Game Server Login Token, usually called a GSLT. Add one if you want strangers to find you by browsing. Skip it if you are running a private server for a group who will use the address.
- Go to the Steam game server account page at https://steamcommunity.com/dev/managegameservers while signed in to Steam.
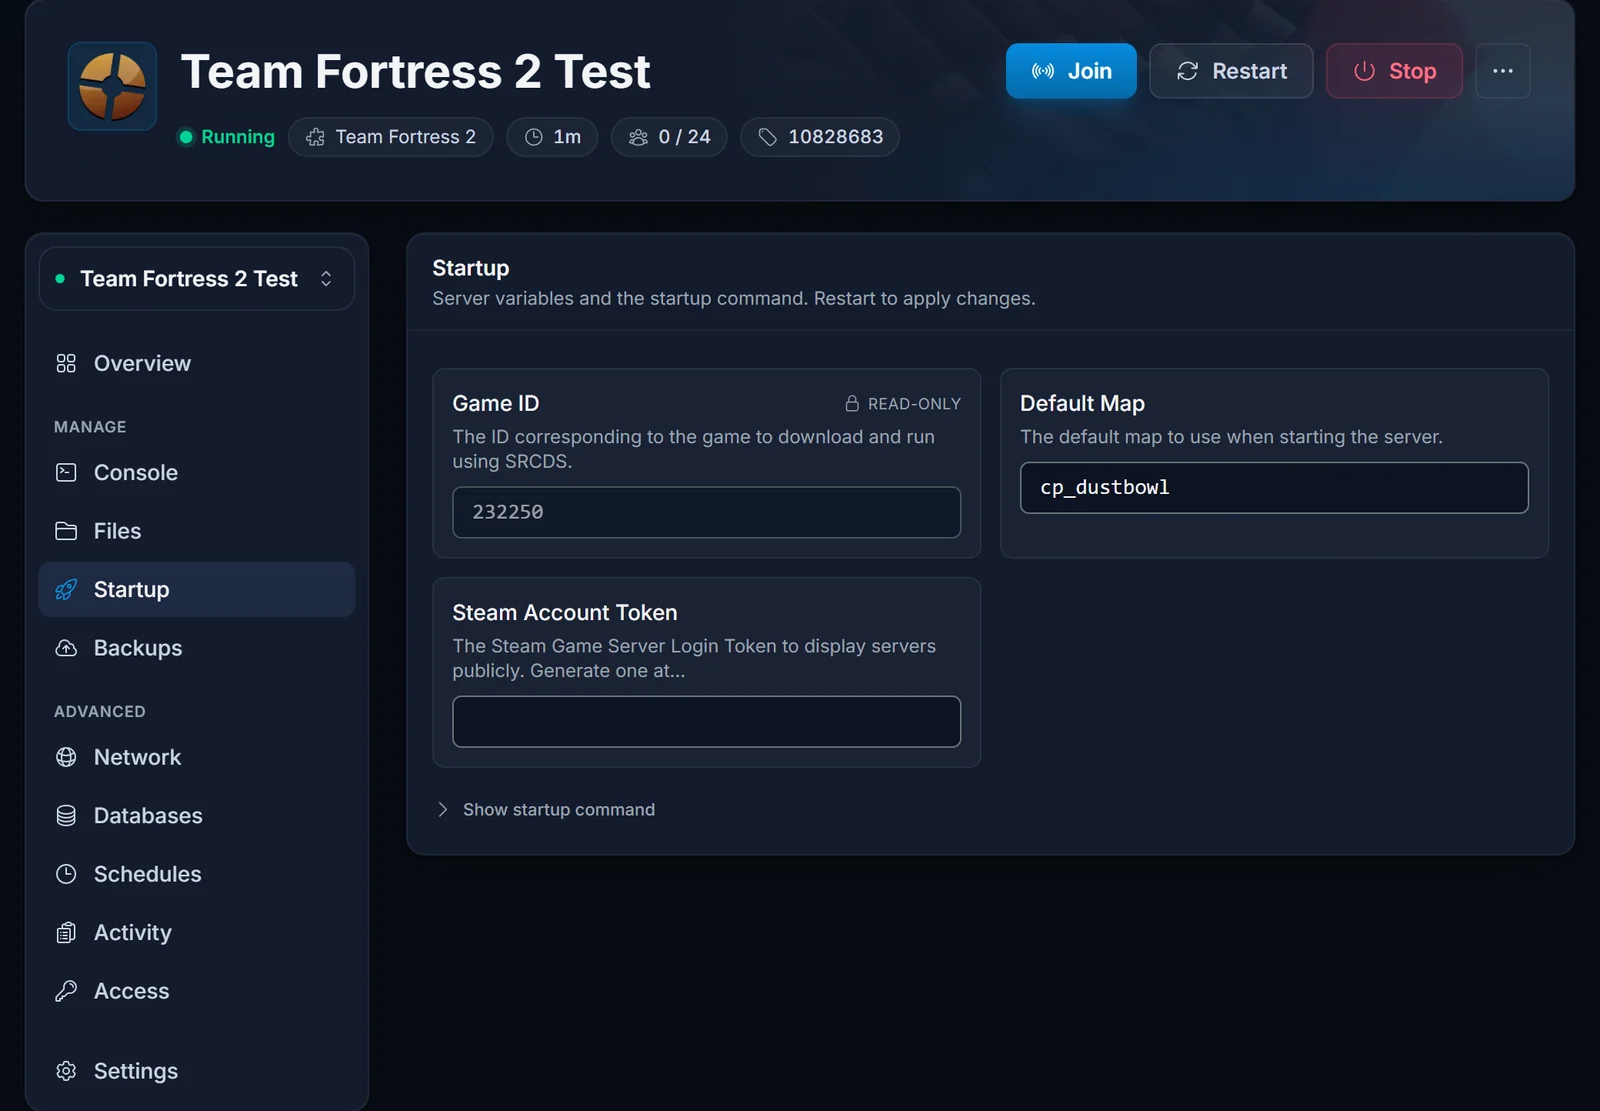
- In the App ID field enter 440. That is Team Fortress 2 the game. Do not enter 232250, which is the dedicated server tool, because a token created against the wrong App ID is silently ignored.
- Give the token a memo you will recognise later, create it, and copy the 32 character token.
- In the panel, open the Startup tab, paste the token into the Steam Account Token field, save, and restart the server. The field is optional, so an empty one is a perfectly valid setup.
Three rules people learn the hard way:
- One token per running server. Two servers sharing a token is not supported.
- Steam revokes a token that goes unused for 30 days. If your server disappears from the browser months after a perfectly good setup, this is almost always why. Create a fresh token and paste it in.
- With or without a token, players can always reach you by adding your
IP:PORTunder Favourites in the game.
Set your server name, password and admin password
The server reads tf/cfg/server.cfg every time a map loads. Open the Files tab in the panel, browse to tf/cfg, and edit server.cfg. A sensible starting point:
hostname "My Team Fortress 2 Server"
rcon_password "pick-something-long"
sv_password ""
sv_lan 0
sv_region 3
sv_pure 1
mp_timelimit 30
sv_allowdownload 1
sv_allowupload 1
sv_passwordempty means anyone can join. Put a password in it for a private server and share it with your group.rcon_passwordis what lets you run admin commands from the game console. Keep it long and do not reuse it anywhere else.sv_regionsets the region your server reports: 0 is US East, 1 US West, 2 South America, 3 Europe, 4 Asia, 5 Australia, 6 Middle East, 7 Africa, 255 world.sv_pure 1blocks clients from loading most of their own replacement files. Set it to 0 while you are testing custom content and put it back afterwards.
Save the file and restart. The Console tab shows the server reading the config as the map loads.
Choose the starting map and the map cycle
The map the server boots into is a startup variable, not a config line. On the Startup tab, set Default Map to the map you want, for example ctf_2fort or pl_upward, then restart.
What plays after that comes from tf/cfg/mapcycle.txt. One map name per line, played top to bottom:
ctf_2fort
cp_dustbowl
pl_upward
koth_viaduct
cp_process_final
If mapcycle.txt does not exist yet, create it in tf/cfg. The game falls back to mapcycle_default.txt when it is missing, which is why a server sometimes ignores the rotation you thought you set.
Add SourceMod and MetaMod:Source
Almost everything people associate with a community server, admin menus, map voting, Versus Saxton Hale, class limits, is a SourceMod plugin. SourceMod needs MetaMod:Source underneath it. You install both yourself, which means you choose the versions and nothing is forced on you.
- Download the Linux builds of MetaMod:Source and SourceMod from their own sites.
- Extract each archive locally. Both contain an
addonsfolder. - In the panel's Files tab, go to
tfand upload the contents so you end up withtf/addons/metamodandtf/addons/sourcemod, plus themetamod.vdffile intf/addons. - Restart the server and check the Console tab, or run
meta versionandsm versionfrom the game console after connecting.
Plugins are .smx files that go into tf/addons/sourcemod/plugins. Give yourself admin rights by adding your Steam ID to tf/addons/sourcemod/configs/admins_simple.ini, then use sm_admin in game.
SFTP works for all of this too if you prefer a desktop client like FileZilla or WinSCP. Your host, port and username are on the panel's Access tab.
Custom maps and how players download them
Upload .bsp files into tf/maps with the file manager or over FTP, then add the map name, without the .bsp, to mapcycle.txt.
By default a joining player downloads a custom map straight from your server, which is slow and makes people give up during the loading screen. The fix is a fast download host: put your maps on a web server you control and point the game at it.
sv_allowdownload 1
sv_downloadurl "https://files.example.com/tf2/"
sv_allowupload 1
We do not host that file server for you, so this only applies if you already have web hosting. Without it, custom maps still work, they just download slowly.
Keeping the server on the current game version
Valve still patches Team Fortress 2. When a patch lands, clients update immediately and your server keeps running the older build until you update it, at which point players are refused with a version mismatch. Updating is a Reinstall from the panel, which re-runs SteamCMD and pulls the current build.
Reinstalling keeps your files, but take a backup from the Backups tab first if you have put real work into your configs, maps and plugins.
Common issues
The server is not in the server browser. Only a server with a valid token gets listed. Check the Steam Account Token on the Startup tab: a blank field, the wrong App ID, a token shared with another server, or a token Steam revoked after 30 days of inactivity all produce exactly this symptom. The server itself is fine, and players can still join by IP:PORT in the meantime.
Players get a version mismatch. The game patched and the server has not. Reinstall from the panel.
The map cycle is ignored. The file has to be tf/cfg/mapcycle.txt, one map name per line, no .bsp extension, and every map must actually exist in tf/maps. A missing map stops the rotation dead.
Custom maps take forever to download. That is the in-game transfer. Set sv_downloadurl as shown above.
SourceMod does not load. Check that tf/addons/metamod.vdf exists and that the folder layout is tf/addons/metamod and tf/addons/sourcemod, not nested one level deeper. Uploading the archive's root folder by mistake is the usual cause.
The server will not start after a config change. Open the Console tab and read the last lines before it stopped. An unclosed quote in server.cfg is the most common culprit.
Next: How to Join a Team Fortress 2 Server. If you are still deciding on RAM, the Team Fortress 2 server hosting page explains how slots and memory work on our plans.
